Related Posts Widget for Blogs by LinkWithin
Showing posts with label DIY. Show all posts

Monday, October 13

Homemade Baby Wipes & Wipe Solution


Whether you cloth diaper or use traditional disposables, this homemade wipe solution is so great. It it cost-effective, safe and gentle on little bums, and smells so sweetly of herbs. We prefer to make the solution and use it as a spray, but you can also make homemade wipes using this same recipe. We use these flannel wipes instead of disposables and most often just wash our little man's bum with plain old warm water. Sometimes, though you need reinforcements, and the essential oils I use are great for this!


Simple Wipe Solution:
1 cup filtered water
1 tablespoon liquid castille soap (I like Dr. Bronner's Baby Mild)
1 tablespoon organic oil (olive, coconut or a mixture like this one)
2 drops melaleuca (tea tree) essential oil
*two 4 ounce glass spray bottles
*This makes 8 ounces, so I divide it between two 4 ounces bottles and keep one on the changing table and one in our diaper bag. Alternatively, you can store in an 8 ounce glass spray bottle.
.

To make the solution:
Place ingredients in a small glass bowl in the order listed and mix well. Pour into your glass bottle and keep at room temperature. I like to divide it between two small bottles and keep one in Elliot's room and one in the diaper bag.

To make wipes:
 Simply place cloth wipes or washcloths in a container of your choice and pour the solution over them. Alternatively, you can cut a roll of paper towels in half and place in a container and cover with the solution, if that suits your preference. 


Happy diapering.
xoxo

To learn more about Young Living Essential Oils and/or to get a starter kit of your own (and a 24% discount on all oils!) click here.

- - - - - - - - - - - - - -
Any suggestions made on this blog are very specific to Young Living essential oils and should not be used with oils from another source. Statements made on this website about Young Living Essential Oils have not been evaluated by the FDA. These products and information are not intended to diagnose, treat, cure or prevent any disease. Anyone suffering from disease or injury should consult with a physician. Keep out of reach from children. If you are currently on medication, please DO NOT STOP

copyright Hiking in Stilettos

Thursday, October 9

Cleaning with Lavender


Oh, lavender. It's probably my all time favorite scent. If an item comes lavender-scented, I would purchase it. Dish soap, laundry detergent, candles, you name it. However, for about the last year or so I have been on a mission to get rid of all the harsh synthetic chemicals in our daily lives and replace them with natural counterparts. Goodbye bleach, hello lemon! One of my favorite ways to control our exposure to chemicals is to make things myself. Also, I save a lot of money! Baking soda and white vinegar are much less expensive than some of my old go-to cleaners. Add in some lavender or lemon essential oil, and voila! Homemade cleaners. Here are some of my favorite uses for lavender for cleaning your home:


HOME:

-- All purpose cleaner --
3/4 cup baking soda
1/4 cup fresh lemon juice OR 3-4 drops lemon essential oil
3 T natural liquid soap  -- I use Dr. Bronner's Baby
1/2 cup white wine vinegar
10 drops lavender essential oil
Mix together in a ceramic bowl to make a paste and scrub surfaces, rinsing with a damp cloth or water. Use to clean counter tops, stove tops, bathroom counters and floors, tubs & sinks and kitchens! Store in a large glass spray bottle.

OR
Simply add a few drops of lavender essential oil to a damp cloth and wipe across any surface.


-- Glass & mirror cleaner --
1 cup white vinegar
1 cup distilled water
 10 drops lavender essential oil
Combine in a glass spray bottle  and use as you would any glass cleaner! You can also use the all purpose cleaner for windows and mirrors
- - - - - - - - - - - - - -


FLOORS:

-- Floor cleaner --
1/4 cup white vinegar
a bucket of water
a few drops of liquid soap (optional)
10 drops of lavender essential oil
Mix together in your mop bucket and clean away! If your floors are really grimy, add a couple drops of liquid soap. Safe for hardwood or linoleum. Other great oils for cleaning floors include lemon, spruce (think Pine-Sol), purification and melaleuca (tea tree). 


-- Carpet freshener --
1 cup baking soda 
18 drops of lavender essential oil
Mix well and place in a covered container (I like mason jars) and let sit overnight to make sure the baking soda absorbs all the wonderful lavender oil. Sprinkle on carpets just before vacuuming. This is also great with lemon or peace & calming!
OR
Simply add a few drops to a cotton ball or tissue and place in the bag of your vacuum cleaner. I alternate doing lemon and lavender!

- - - - - - - - - - - - - -


LAUNDRY:

-- Simple linen spray --
Fill a  4oz glass spray bottle about halfway with distilled water and add about 10 drops of lavender essential oil. I spray this on our sheets, blankets, upholstered chairs, couch, Elliot's bedding, our pillows, the dog bed (purification is a good oil for this!), camping linens, etc. Use pretty much everywhere!

-- Add to basic laundry detergent --
Add 3-4 drops of lavender essential oil directly to the detergent in the detergent compartment of your washer. I like to use free & clear detergent, and I have an HE washer, so it's safe! 
-- Homemade fabric softener --
1/2 cup white wine vinegar
10 drops lavender essential oil
Use the same way you would store-bought fabric softener to soften your laundry and make it smell wonderful at the same time! Store in a small glass jar.

-- Wool dryer balls --
I switched over to using wool dryer balls  when I was pregnant with E and researching homemade cloth diaper detergent. Absolutely love them! Natural, inexpensive and the lavender makes our clothes smell divine. Place 3-4 drops of lavender onto each wool dryer ball and place into the dryer with your clothes.


To learn more about essential oils or to purchase your own, click here.

- - - - - - - - - - - - - -
Any suggestions made on this blog are very specific to Young Living essential oils and should not be used with oils from another source. Statements made on this website about Young Living Essential Oils have not been evaluated by the FDA. These products and information are not intended to diagnose, treat, cure or prevent any disease. Anyone suffering from disease or injury should consult with a physician. Keep out of reach from children. If you are currently on medication, please DO NOT STOP.

Sunday, March 9

Spring Fever // The Home Edition


The warm sunny days filling the weekends lately have put me into serious cleaning and organization mode. Like every other home owner I know, I have a laundry list of projects, updates and DIYs for our house. Unfortunately, being nine months pregnant hinders some of these projects, so I've turned my attention to the things I can currently complete. Husband recently helped me update our couch's end tables via this Ikea hack, and I am so pleased with the end result. Now my sights are set on updating the rest of our living and dining room furniture and revamping our front entrance... and perhaps completing a few outdoor projects along the way! 

Antler Water Hose Hook {I think husband can make this}
Bleecker Side Chair - Jonathan Adler for JCP
Walton Sofa - West Elm

I've been eyeing dining room chairs for a while, and these Jonathan Adler ones are pretty perfect with the wooden base and nail head trim. Also for the dining room, I think some industrial wood shelving would make a neat alternative for a bar or bar cart. As for our patio, I'd like to make some simple modern planters to house some of our favorite plants and make a cool garden hose hanger for the side of the house since the current one is an eyesore.

Do you have any spring projects or updates in mind?
{All products and links can also be found here.}
xoxo

copyright Hiking in Stilettos

Tuesday, January 7

Hen Party

1 / 2

Since husband and I eat eggs regularly we decided last fall that we wanted to have our own chickens. After a bit of research, we found some locally and started building our coop. Since it's early days, the coop has come a long way, but we are still improving it. The original design cost us under $50 since we used a lot of material we already had. But with all the cold weather and wind, we have decided to spend little more time and money on making the girls a better home and are in the process of remodeling their coop. 

We plan to create a new coop and run off of the side of our existing shed. We will use treated siding that is weather proof (unlike the plywood) and attach a dog kennel that we already have to use as a run. We also already have some tin roofing and will purchase a couple more pieces to allow for a roof over the run as well. We have an old ladder and perches that we currently use, so those will go in the new coop, too. Our nesting boxes are made of plywood, but you can easily use anything for a nesting box! We plan to add a couple windows to the front of the coop, which are easy to find at thrift stores, but we happen to have a two old ones that we can use. The final touch will be a red lamp to promote egg laying during the winter months and will provide a little heat for the cold winter days. {We have actually already added the light to the current coop since it's been so bitter cold at night. We turn it off during the day when it's a bit warmer.}

Currently we have three chickens -- a Buff Orpington and two Araucanas. Interestingly, the Araucanas are Easter egg layers, meaning they lay teal or pink eggs. We lucked out and got one that lays teal and one that lays a pale pink egg. They all taste the same, but it's a fun conversation piece and they look great sitting on the counter! And after our new coop is complete, we plan to get two more ladies.

We feed them traditional food which does contain wheat and corn, but we also give them plenty of greens and vegetable and fruit scraps. They spend a lot of time scratching around in our yard, so they get plenty of protein. We are researching making our own food which would be free of grains, but it may not be very realistic given the fact that we don't have access to some of the ingredients. I'll keep you posted on what we find out.

Do you have backyard chickens? If so, any words of wisdom or funny stories?
xoxo

copyright Hiking in Stilettos


Monday, July 1

{P}inspiration: Outdoor Spaces


After four days in the secret gardens of Boquete, Panama, husband and I are on a mission to transform our backyard this summer. We finally finished laying the flagstone patio {labor. of. love.}, which I promptly adorned with vintage chairs, sweetheart roses and modern white planters, and are turning our attention to taming the jungle that is the backyard landscape. {Side note: we are seriously considering renting some goats to chomp away at the brush in our yard. It's that bad.. And we don't want to use a ton of weed killers and pesticides.} We have carved out a couple flower beds to fill with Queen Anne's Lace {I see a foraging expedition in my near future} and Lantana, and are trying to decide whether or not to sod the giant bank behind our porch. Alas. Instead of boring you with the details of our backyard plans, here are some outdoor spaces/landscapes that I absolutely love.

1 / 2 / 3 / 4 / 5  / 6 

themes: unique seating, plenty of greenery, mosquito-repelling plants, a place for entertaining
 
all can be found here as well.
xoxo

 copyright Hiking in Stilettos
 

Thursday, June 6

Secret Garden


One of my favorite places to sit and read or share a cup of coffee and conversation is my parent's backyard. We spent countless hours outside as children, helping dad cut the grass and build walkways or helping mom plant window boxes and create beautiful flower beds. It is amazing to look back now and see the transformation of their back yard. {I even remember planting the cypress trees that now reach as high at the second story of the house!}

A love of gardening is definitely a trait I received from my mother. There is something so peaceful about a garden, being surrounded by all that greenery and life. And there is something very cathartic and fulfilling about seeing years of hard work turn into such a beautiful escape.


xoxo

copyright Hiking in Stilettos

Monday, April 15

This Young House: Building a Hairpin Leg Bench


Our master bedroom is one of the only rooms in our home that is close to being finished. Aside from large projects like exchanging our horrid green carpet for hardwood floors, painting the trim and upgrading our nightstands to something more our style, the room is just what we wanted -- a {headboard-less} low bed, industrial lighting, unique and meaningful artwork. One of the few remaining projects we had was to build a bench for the foot of our bed. We were originally looking for something at our local antique and thrift stores, but nothing was exactly what we wanted, so we decided to build the simplest version of our vision.

You will need:
1 - 12 inch x 5ft x 1&1/2in board*
a small can of stain or polyurethane**
4 - 17inch hairpin legs***
12 - 1&1/4 inch screws


Sand, stain and seal the wood to your desired color and let dry overnight. Assembling the legs is quite simple. Lightly attach two legs on opposite corners, then turn the bench over and place the remaining legs underneath to see if and where they are uneven. {This step requires a second pair of hands!} Use the supplied spacer on the leg that is uneven. Attach the remaining legs and secure tightly. Viola!


xoxo

Other considerations...
*Our bed is about 5feet wide so we chose to make the bench the same length. If you want something longer, use a longer length board
- - - - - - - - - - - - -
**If making an outdoor bench, including one you may place on a deck or front porch, be sure to use indoor/outdoor or outdoor stain to protect against rain.
- - - - - - - - - - - - - 
***Obviously, the height of the legs will depend on how tall you need the bench to be. We wanted ours just slightly lower than our bed, so 17inch legs worked perfectly. 

copyright Hiking in Stilettos 

Wednesday, January 9

This Young House: How to Build a Farm Table


When husband and I moved into our home, one of the first projects we wanted to tackle was our dining room table. We had a hand-me-down that had been painted a few times and was really quite small, so an upgrade was in order. Since we weren't prepared to spent a couple thousand dollars for a farm table and chairs, we decided to make one ourselves.The styles we liked were relatively simple in design, so we headed out to our local ACE Hardware and picked out some lovely cedar with only a vague plan in mind.

What we used:
4 - 12x2x66 cedar planks {table top}
4 - 4x4x36 cedar posts {legs}
4 - 1x2x36 cedar boards {reinforcements}
8 - L brackets
1&1/2 inch wood screws
wood glue {optional}

After we cut the boards to the appropriate lengths, we sanded them and placed clear coat on each piece to protect and set the wood. The next day we got to the building! 

Step 1: Place top boards upside down on a tarp and use tie-down straps to hold the them tightly together.
{You could also use some wood glue here to help keep the boards together. We chose not to because we actually like the aesthetic of the boards being just slightly apart.}

Step 2: Connect the legs to the braces.
{This allows you to not place visible screws into the table top.}


Step 3: Attach the legs/braces to the table top and reinforce with L-brackets.
{We also placed L-brackets against the legs and brace wood for added support.}

Repeat steps 2&3 at the other end on the table.
Step 4: Place two more brace pieces evenly underneath the table and secure with screws.
Step 5: Flip the table over, move it inside & make a centerpiece!


Our next step is finding eight chairs that we love... within our price range.

Happy carpenter-ing.
xoxo

copyright Hiking in Stilettos

Thursday, September 20

DIY Industrial Sconces


One of the things I am excited to share with you is the process of recreating our new-to-us home. Admittedly, the place is dated and a little too country for our liking, but it's nothing a few gallons of paint and some elbow grease can't fix. So, I've come up with a 'This Young House' series which will highlight some of the things we are doing {or having done when it's beyond our skill level}. Naturally, we have a laundry list of projects, large and small, but we've decided to start with the small ones and work on just a couple rooms at a time... but more on that later.

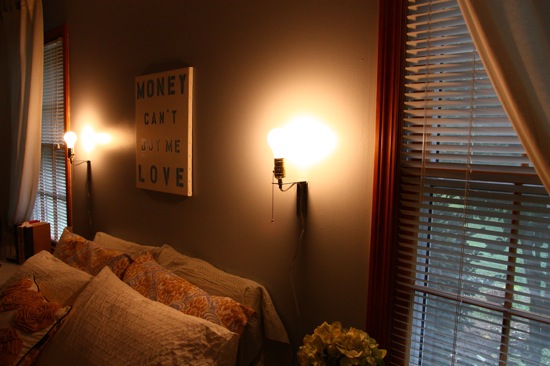
One of the first areas we decided to tackle was the master bedroom. We want the space to feel calm and almost cave-like while still seeming airy and welcoming. For us that means a neutral color palette, layers of linens on the bed, and a few meaningful, dramatic details.

As for lighting, we decided on sconces versus table lamps to save precious bedside real estate for books and water glasses. Most of the sconces we liked were on the pricier end, so we decided to recreate a version of these. The process was really quite simple once we figured out what supplies we needed. 


Supplies:
two steel brackets {not shown above}
two lamp sockets
two lamp cords
a pack of steel nipples {no snickering}
a back of hex nuts

Other master bedroom projects:
- WALL ART: I'm waiting for the autumn/winter collection of these decals. I want to place the decal on a piece of old wood stained the same color as our imaginary bench.
- PAINT: While we've already painted the walls what we thought was a silver grey, a darker slate grey will be going up in a few weeks.
- A BENCH: We are building a bench for the foot of the bed out of some leftover wood and hairpin legs.
- HARDWOODS: As I've mentioned before, the carpet in this room is heinous. Simply heinous, people.
- {FAUX} COWHIDE RUG: We're envisioning a unique, dramatic rug to place under the bed after our hardwoods make their appearance.

More home improvement projects are on the way. There are so many!
Happy Friday.
xoxo

copyright Hiking in Stilettos

Tuesday, April 3

Simple Improvements: On a Roll


I found this leather and wood chair a while ago at the local Habitat for Humaity REstore and have been wanting to transform it into a more functional desk chair ever since. I love the simplicity of the black leather and the worn scratches in the wooden arms. Plus, I think it will look great in our new office... once we move into the house, paint the room, build a wall mounted double desk, and find a clear lucite chair for my side. But those are minor details, right?

The process was more than easy. Remove the nails from the chair legs, drill new holes into the legs {while being oh so careful to maintain the correct angle and not drill through to the outside}, place the hardware into the legs, and viola. A new, rolling desk chair.


Grand total cost: $22
{$10 chair, $12 two packs of casters}

xoxo

copyright Hiking in Stilettos

Monday, March 12

Outdoor Spaces


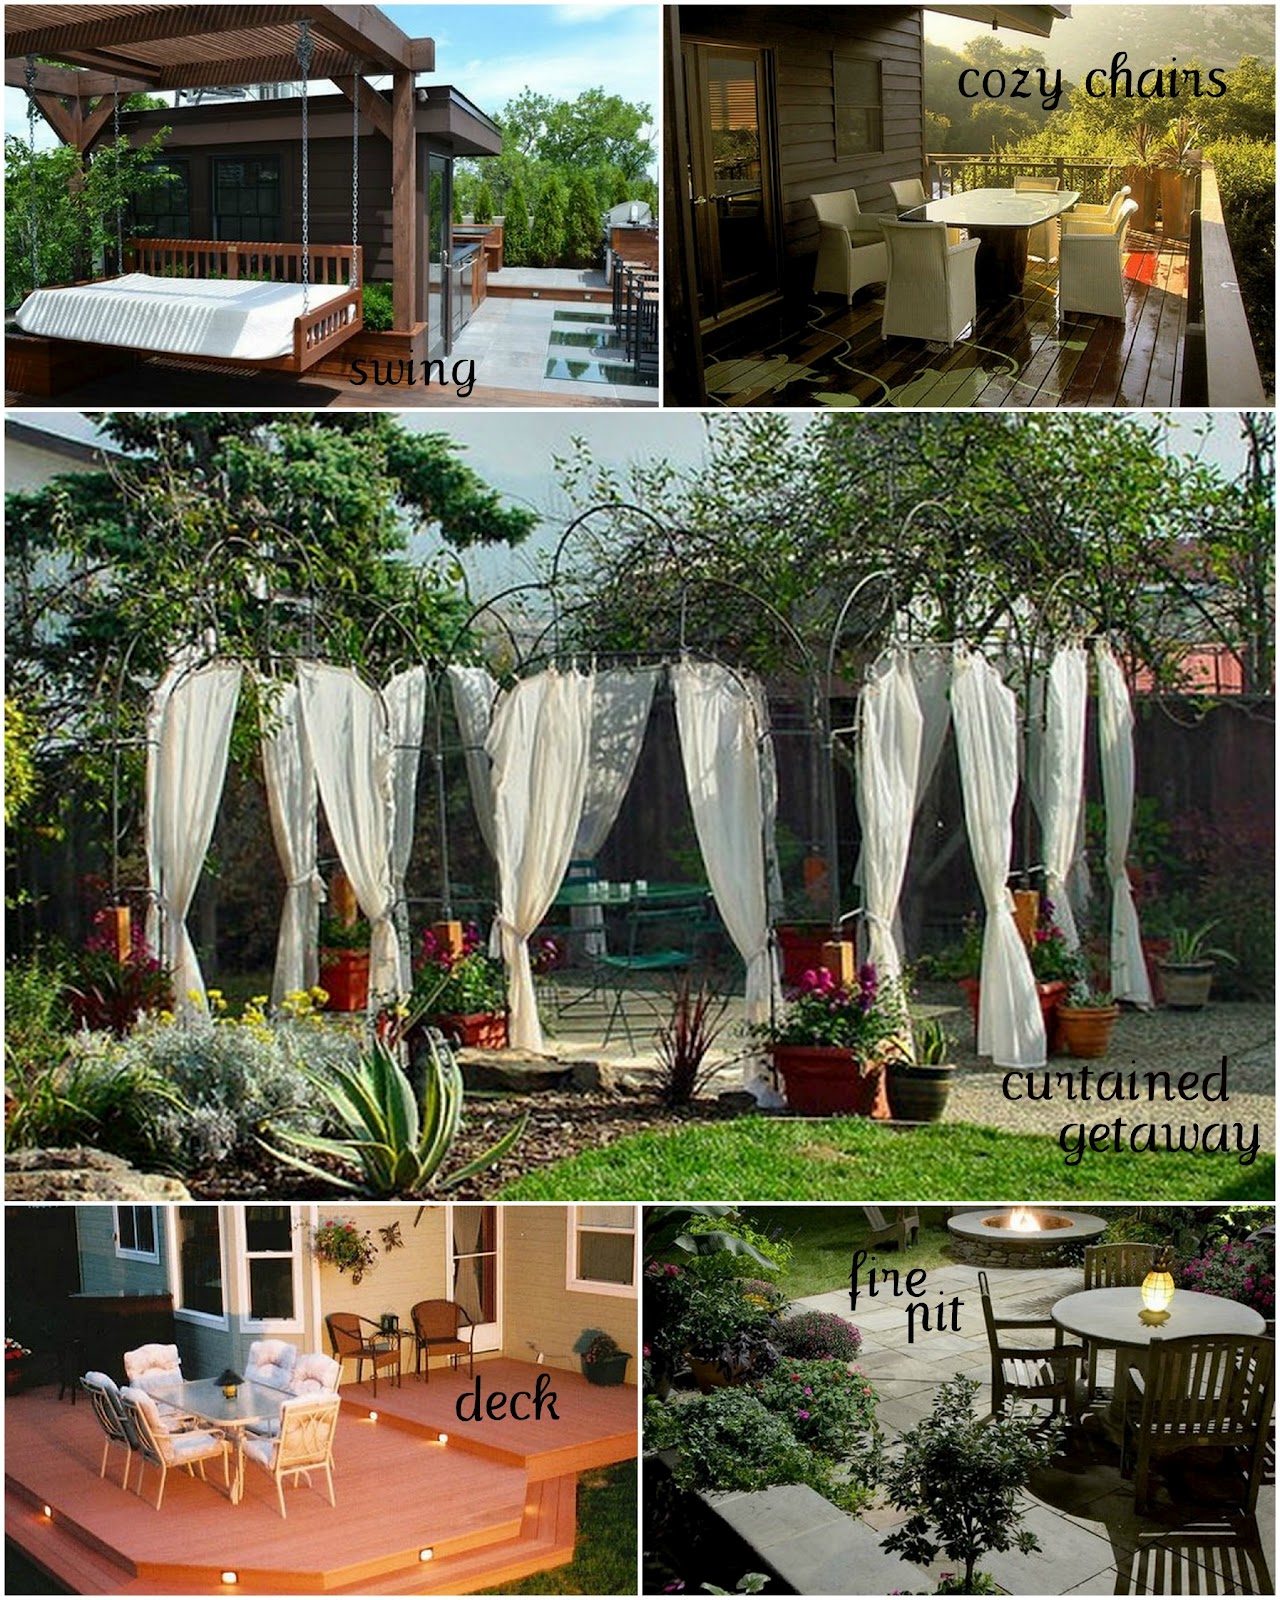
One of the most exciting things about purchasing a home is the potential for creating a really incredible outdoor space. A place for grilling and entertaining, curling up in the sun with a book, planting an herb and vegetable garden, and simply enjoying nature. Lately I've been scouting deck design websites and bookmarking some inspiring spaces that I'd like to emulate. Here are some of my current favorites.


{all can be found here}
xoxo

copyright Hiking in Stilettos

Tuesday, January 10

Rosemary Mint Body Scrub


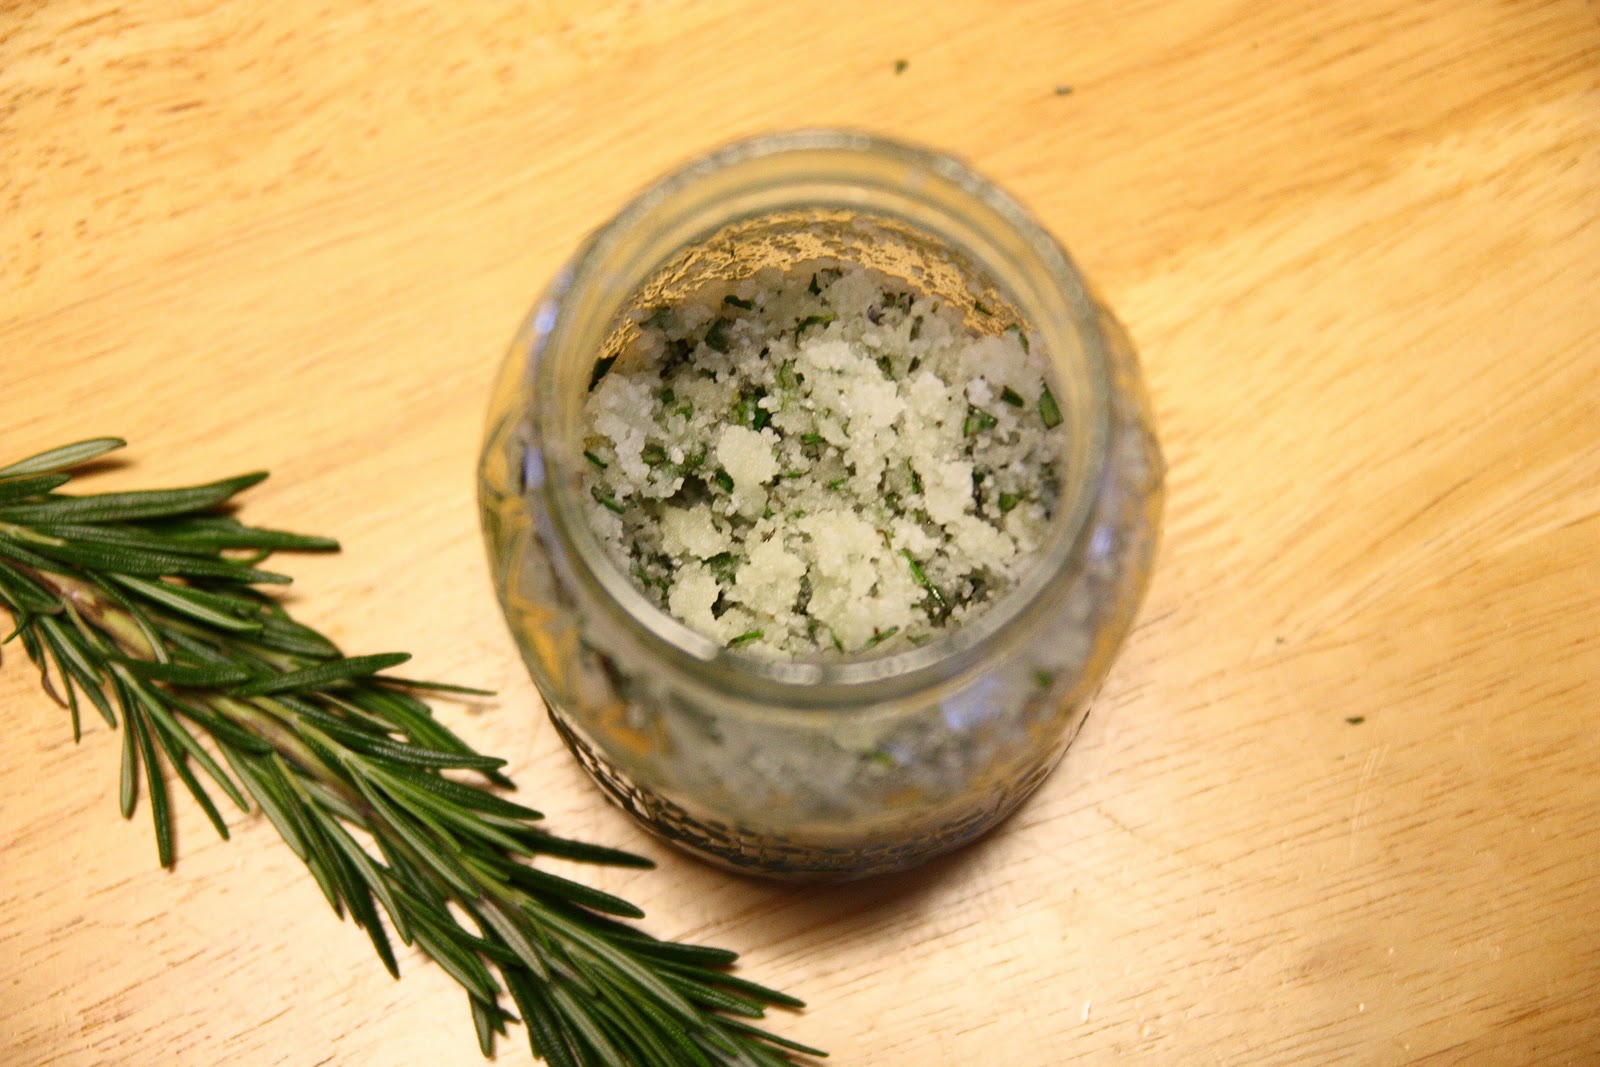
When I was in college I was obsessed with Aveda's rosemary mint hair products. I loved the faint tingle the shampoo gave my scalp and the sharp and sweet smell that lingered all day. Luckily for my college student budget, I had friends who worked in salons and Aveda shops who were able to feed my obsession keep me supplied with rosemary-mint goodness. Now that I'm older, I've graduated to using all natural tea tree products for my hair, but I still love the combination of rosemary and mint. So, this sweet combination seemed like the logical choice when I decided to make my own body scrub.

For some reason I haven't been overly particular about using all natural products when it comes to skin and hair care. I've always been one to read labels and try to purchase the best products, but despite being very conscious of what goes in my body, I haven't been equally as conscious about what goes on it. Well, no more. I've switched out my supposedly sulfate-free shampoo for one made from tea tree oil and plant extracts and have embarked upon making my own body scrubs. The process was simple and allowed me to control how much or how little fragrance went into the product. Also, the obvious plus is that there are four {count them, only four} ingredients here.

How-to:
approx. 1/2 cup coarse salt
approx. 1/2 cup grapeseed oil (or olive or coconut)
lots of rosemary and mint leaves*, chopped

Fill a container of choice with salt and add just enough oil to wet the salt. Add in the chopped leaves and mix well. If your container is small, you may need to transfer the mixture to a bowl in order to thoroughly combine all the ingredients. If you want a stronger fragrance, add more leaves.  
*Note: you could also use a few drops of essential oils instead of actual herbs.


Next up, it's a sugar scrub with coconut oil and lavender.
xoxo

copyright Hiking in Stilettos