Related Posts Widget for Blogs by LinkWithin
Showing posts with label home decor. Show all posts

Monday, November 10

The Anatomy of a Wall Collage


I love a good collage. Mixing prints, textures and colors is a general theme around our home. And  whether small or large, a good wall collage adds personality and depth to any room. Here are some of my tips for achieving your perfect mix. 


1. Make it personal
Use items from your life - your wedding, your adventures, meaningful quotes -- something from your favorite novel, a line or two of poetry or even an entire poem, or song lyrics -- perhaps the song you danced to at your wedding, or the one your mother used to sing to you as a child.

2. Find a common theme
Make one element of the collage cohesive  -- perhaps a color story {I went with neutral colors in my living room collage}, using the same frame for each piece, a wall of only poetry or song lyrics, pictures from your honeymoon or a favorite trip. Find something that ties a common thread between all pieces.


3. Plan it out
I like to lay the collage on the floor to get the perfect arrangement, then cut out shapes from paper that match each piece. Lightly tape each piece of paper to the wall and tweak the placement as needed. It may seem like extra work, but I guarantee you it is far easier than rearranging things after you've already made holes in the wall. I especially suggest this if you are trying to hang multiple things in one straight line.

4. Don't be afraid to switch it up
Changing out pieces in the collage helps keep things fresh, especially during the holiday season. I like to add silver Christmas balls to the antlers in our living room or string garland across the frames to make them more festive. Also, if you find another piece of art that you love, find a way to incorporate it into your collage.


xoxo

copyright Hiking in Stilettos

Saturday, October 18

Weekends + Wishlists


Lately I've been compiling a small list of items that I would love to own. Husband and I didn't do anything for each other for our birthdays this year or for our anniversary, so I am thinking a few select gifts may be in order for the Christmas season. Also, considering the fact that last year every single gift I received (not exaggerating!) was for Elliot, a couple indulgences would be nice. Here is a carefully curated list of lovely things that would make excellent gifts, in my opinion:


This Pendelton blanket is at the top of my list. I have been wanting one for years now, and since we are finally at a somewhat finished place with our master bedroom renovations, it may be time to invest. The one I originally wanted is no longer available in the size we need, but I really like the pattern of this one as well. 

These grey and white striped napkins would be nice. We don't use paper towels too much in our house, but I'd like to limit our use even more by having some lovely but practical cloth napkins on hand.

A few new linen kitchen towels would be nice as well (perhaps this one, this one and this one). Because I typically buy white ones, but they become discolored too quickly, and honestly it's time to do some replacing. (But don't worry. Those old, discolored towels will be disinfected and transformed into dust rags and baby wipes.)

And maybe one of these lovely trays... to corral the random items on our coffee table and because I have a soft spot for trays

This stain remover bar. I am a recovering Tide pen-aholic, but since removing chemicals, etc from our home, I haven't looked back. Nonetheless, this is a great thing to have on hand, especially when the tiny being in your house has a penchant for spilling your coffee on the beige sofa.

A pair of short, colorful rain boots. Because they are practical.. and cute.

A pretty pair of kitchen scissors and a magnetic knife block. 


And if we are dreaming big.... this beautiful essential oil organizer. 


Happy weekend.
xoxo

copyright Hiking in Stilettos

Sunday, March 9

Spring Fever // The Home Edition


The warm sunny days filling the weekends lately have put me into serious cleaning and organization mode. Like every other home owner I know, I have a laundry list of projects, updates and DIYs for our house. Unfortunately, being nine months pregnant hinders some of these projects, so I've turned my attention to the things I can currently complete. Husband recently helped me update our couch's end tables via this Ikea hack, and I am so pleased with the end result. Now my sights are set on updating the rest of our living and dining room furniture and revamping our front entrance... and perhaps completing a few outdoor projects along the way! 

Antler Water Hose Hook {I think husband can make this}
Bleecker Side Chair - Jonathan Adler for JCP
Walton Sofa - West Elm

I've been eyeing dining room chairs for a while, and these Jonathan Adler ones are pretty perfect with the wooden base and nail head trim. Also for the dining room, I think some industrial wood shelving would make a neat alternative for a bar or bar cart. As for our patio, I'd like to make some simple modern planters to house some of our favorite plants and make a cool garden hose hanger for the side of the house since the current one is an eyesore.

Do you have any spring projects or updates in mind?
{All products and links can also be found here.}
xoxo

copyright Hiking in Stilettos

Monday, December 16

A Shabby Chic Christmas


This past weekend we held a small surprise birthday party for my sweet mother at my parent's house. I shared a few of her Christmas decorations before, but I was amazed yet again by how festive and cozy their house is a Christmas time. 

My mother's style is what I would call shabby chic glam. Gold and white, glitter and lace, fresh greenery and birch wood, twinkling lights and fireplace logs. I love the tree placed in a wicker basket, the handmade cloth and lace garland, and the red-orange flicker lights on the birch logs under the mantle.


 I can't believe that Christmas is merely a week away!
xoxo

copyright Hiking in Stilettos 

Monday, July 1

{P}inspiration: Outdoor Spaces


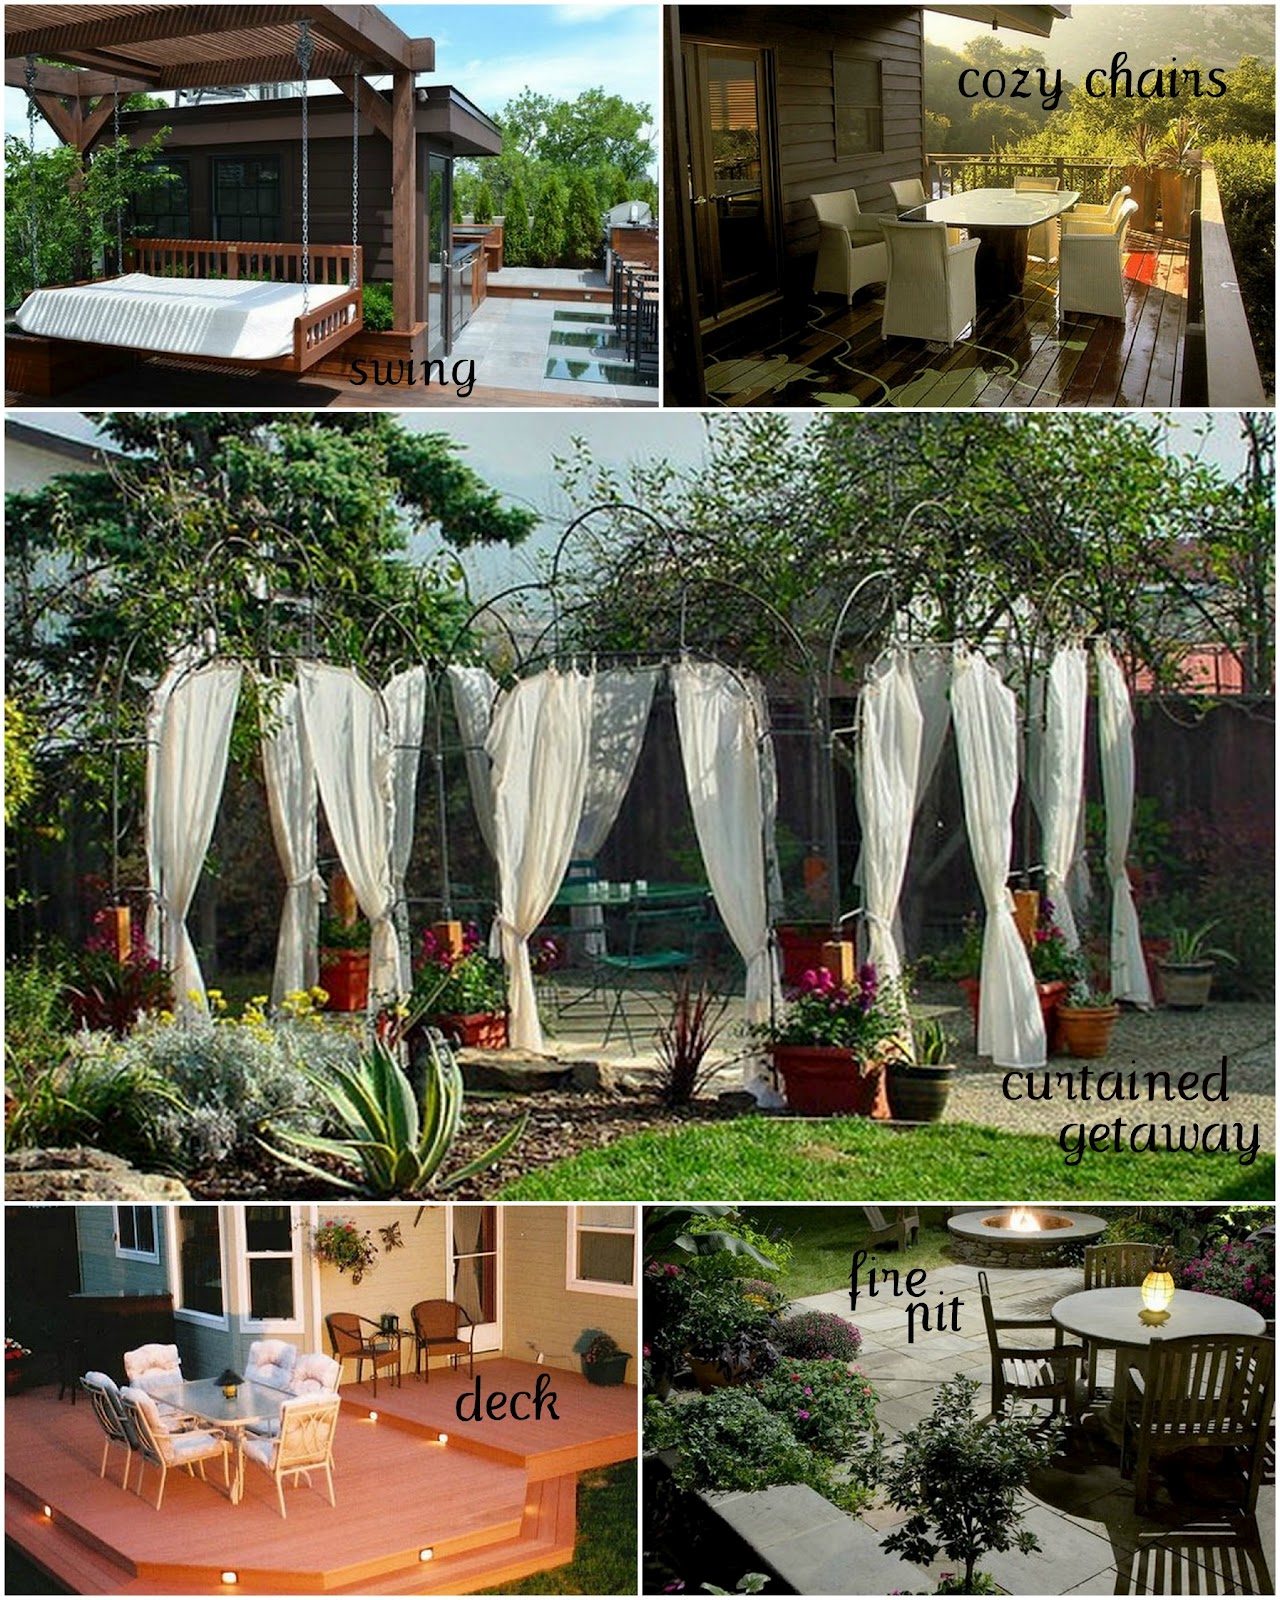
After four days in the secret gardens of Boquete, Panama, husband and I are on a mission to transform our backyard this summer. We finally finished laying the flagstone patio {labor. of. love.}, which I promptly adorned with vintage chairs, sweetheart roses and modern white planters, and are turning our attention to taming the jungle that is the backyard landscape. {Side note: we are seriously considering renting some goats to chomp away at the brush in our yard. It's that bad.. And we don't want to use a ton of weed killers and pesticides.} We have carved out a couple flower beds to fill with Queen Anne's Lace {I see a foraging expedition in my near future} and Lantana, and are trying to decide whether or not to sod the giant bank behind our porch. Alas. Instead of boring you with the details of our backyard plans, here are some outdoor spaces/landscapes that I absolutely love.

1 / 2 / 3 / 4 / 5  / 6 

themes: unique seating, plenty of greenery, mosquito-repelling plants, a place for entertaining
 
all can be found here as well.
xoxo

 copyright Hiking in Stilettos
 

Thursday, June 6

Secret Garden


One of my favorite places to sit and read or share a cup of coffee and conversation is my parent's backyard. We spent countless hours outside as children, helping dad cut the grass and build walkways or helping mom plant window boxes and create beautiful flower beds. It is amazing to look back now and see the transformation of their back yard. {I even remember planting the cypress trees that now reach as high at the second story of the house!}

A love of gardening is definitely a trait I received from my mother. There is something so peaceful about a garden, being surrounded by all that greenery and life. And there is something very cathartic and fulfilling about seeing years of hard work turn into such a beautiful escape.


xoxo

copyright Hiking in Stilettos

Monday, April 15

This Young House: Building a Hairpin Leg Bench


Our master bedroom is one of the only rooms in our home that is close to being finished. Aside from large projects like exchanging our horrid green carpet for hardwood floors, painting the trim and upgrading our nightstands to something more our style, the room is just what we wanted -- a {headboard-less} low bed, industrial lighting, unique and meaningful artwork. One of the few remaining projects we had was to build a bench for the foot of our bed. We were originally looking for something at our local antique and thrift stores, but nothing was exactly what we wanted, so we decided to build the simplest version of our vision.

You will need:
1 - 12 inch x 5ft x 1&1/2in board*
a small can of stain or polyurethane**
4 - 17inch hairpin legs***
12 - 1&1/4 inch screws


Sand, stain and seal the wood to your desired color and let dry overnight. Assembling the legs is quite simple. Lightly attach two legs on opposite corners, then turn the bench over and place the remaining legs underneath to see if and where they are uneven. {This step requires a second pair of hands!} Use the supplied spacer on the leg that is uneven. Attach the remaining legs and secure tightly. Viola!


xoxo

Other considerations...
*Our bed is about 5feet wide so we chose to make the bench the same length. If you want something longer, use a longer length board
- - - - - - - - - - - - -
**If making an outdoor bench, including one you may place on a deck or front porch, be sure to use indoor/outdoor or outdoor stain to protect against rain.
- - - - - - - - - - - - - 
***Obviously, the height of the legs will depend on how tall you need the bench to be. We wanted ours just slightly lower than our bed, so 17inch legs worked perfectly. 

copyright Hiking in Stilettos 

Wednesday, January 9

This Young House: How to Build a Farm Table


When husband and I moved into our home, one of the first projects we wanted to tackle was our dining room table. We had a hand-me-down that had been painted a few times and was really quite small, so an upgrade was in order. Since we weren't prepared to spent a couple thousand dollars for a farm table and chairs, we decided to make one ourselves.The styles we liked were relatively simple in design, so we headed out to our local ACE Hardware and picked out some lovely cedar with only a vague plan in mind.

What we used:
4 - 12x2x66 cedar planks {table top}
4 - 4x4x36 cedar posts {legs}
4 - 1x2x36 cedar boards {reinforcements}
8 - L brackets
1&1/2 inch wood screws
wood glue {optional}

After we cut the boards to the appropriate lengths, we sanded them and placed clear coat on each piece to protect and set the wood. The next day we got to the building! 

Step 1: Place top boards upside down on a tarp and use tie-down straps to hold the them tightly together.
{You could also use some wood glue here to help keep the boards together. We chose not to because we actually like the aesthetic of the boards being just slightly apart.}

Step 2: Connect the legs to the braces.
{This allows you to not place visible screws into the table top.}


Step 3: Attach the legs/braces to the table top and reinforce with L-brackets.
{We also placed L-brackets against the legs and brace wood for added support.}

Repeat steps 2&3 at the other end on the table.
Step 4: Place two more brace pieces evenly underneath the table and secure with screws.
Step 5: Flip the table over, move it inside & make a centerpiece!


Our next step is finding eight chairs that we love... within our price range.

Happy carpenter-ing.
xoxo

copyright Hiking in Stilettos

Thursday, September 20

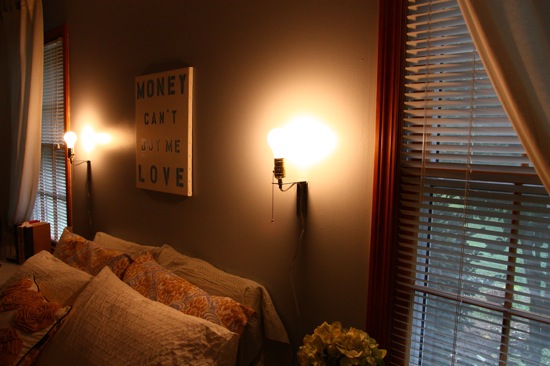
DIY Industrial Sconces


One of the things I am excited to share with you is the process of recreating our new-to-us home. Admittedly, the place is dated and a little too country for our liking, but it's nothing a few gallons of paint and some elbow grease can't fix. So, I've come up with a 'This Young House' series which will highlight some of the things we are doing {or having done when it's beyond our skill level}. Naturally, we have a laundry list of projects, large and small, but we've decided to start with the small ones and work on just a couple rooms at a time... but more on that later.

One of the first areas we decided to tackle was the master bedroom. We want the space to feel calm and almost cave-like while still seeming airy and welcoming. For us that means a neutral color palette, layers of linens on the bed, and a few meaningful, dramatic details.

As for lighting, we decided on sconces versus table lamps to save precious bedside real estate for books and water glasses. Most of the sconces we liked were on the pricier end, so we decided to recreate a version of these. The process was really quite simple once we figured out what supplies we needed. 


Supplies:
two steel brackets {not shown above}
two lamp sockets
two lamp cords
a pack of steel nipples {no snickering}
a back of hex nuts

Other master bedroom projects:
- WALL ART: I'm waiting for the autumn/winter collection of these decals. I want to place the decal on a piece of old wood stained the same color as our imaginary bench.
- PAINT: While we've already painted the walls what we thought was a silver grey, a darker slate grey will be going up in a few weeks.
- A BENCH: We are building a bench for the foot of the bed out of some leftover wood and hairpin legs.
- HARDWOODS: As I've mentioned before, the carpet in this room is heinous. Simply heinous, people.
- {FAUX} COWHIDE RUG: We're envisioning a unique, dramatic rug to place under the bed after our hardwoods make their appearance.

More home improvement projects are on the way. There are so many!
Happy Friday.
xoxo

copyright Hiking in Stilettos

Tuesday, June 26

Light it Up


One of the first projects I have taken on in our new house is the master bathroom. It honestly needs quite a bit of work {envision carpeted floors, no tub, and a sliding door shower}, but for now I'm transforming the spaces with paint, hardware and textiles and new lighting. One of my current challenges is the lighting over the sink and mirror. Here are some of my inspirations that combine both aesthetics and functionality.


This weekend the plan is to transform the oddly placed window in the water closet into a beadboard shelf. Pictures to come!

Also, how about a lighted tub?
xoxo

copyright Hiking in Stilettos

Tuesday, May 29

Managing the Mantle


favorite themes: layered art, empty frames, alphabet 

One of my favorite features in our new home is the dramatic brick fireplace in our living room. The open floor plan of the living area, the layout of the entryway, and the central location of the fireplace make it an obvious focal point in the room. In it's current state, the mantle needs a bit of love. I plan to paint it a pale grey and to remove the heinous gold cover {it's straight from the 90s}, but I haven't decided on how to decorate yet. In our previous apartment, I had meaningful artwork and pictures on our mantle but frequently changed decor. And while I'm sure I will change things up equally often in this home, here are some of my current inspirations.


What is your mantle type?
xoxo

copyright Hiking in Stilettos

Tuesday, April 3

Simple Improvements: On a Roll


I found this leather and wood chair a while ago at the local Habitat for Humaity REstore and have been wanting to transform it into a more functional desk chair ever since. I love the simplicity of the black leather and the worn scratches in the wooden arms. Plus, I think it will look great in our new office... once we move into the house, paint the room, build a wall mounted double desk, and find a clear lucite chair for my side. But those are minor details, right?

The process was more than easy. Remove the nails from the chair legs, drill new holes into the legs {while being oh so careful to maintain the correct angle and not drill through to the outside}, place the hardware into the legs, and viola. A new, rolling desk chair.


Grand total cost: $22
{$10 chair, $12 two packs of casters}

xoxo

copyright Hiking in Stilettos

Monday, March 12

Outdoor Spaces


One of the most exciting things about purchasing a home is the potential for creating a really incredible outdoor space. A place for grilling and entertaining, curling up in the sun with a book, planting an herb and vegetable garden, and simply enjoying nature. Lately I've been scouting deck design websites and bookmarking some inspiring spaces that I'd like to emulate. Here are some of my current favorites.


{all can be found here}
xoxo

copyright Hiking in Stilettos

Thursday, February 2

Pillow Talk


I mentioned a while ago that this may be the year that husband and I become home owners. It's not definite yet {that whole I-need-to-find-a-job thing is getting in the way}, but the prospect is pretty exciting. I've already bookmarked a million or so inspiration images for what I envision as our calm, modern meets rustic bedroom. I am leaning towards a minimal wooden bed frame, a mix of white linens, Lucite tables, a grey {chevron?} duvet, and pops of chartreuse to break up the neutral pallet. Here are some of my favorite inspirations thus far.

 {All images (and my commentary) can be found here.}


Sweet dreams.
xoxo

copyright Hiking in Stilettos